The Kaleidoscope Kreator workspace is divided into the following areas:
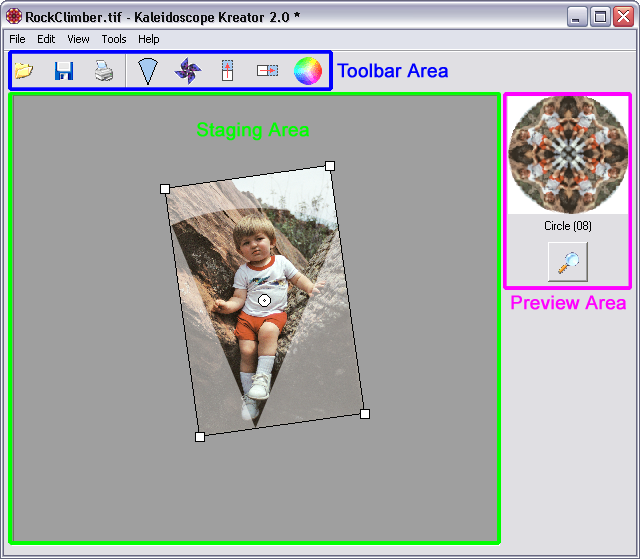
A. Staging Area
The Staging Area is where all of the “action” takes place. When you open an image it's displayed here, along with the segment template. By arranging and adjusting your photo beneath this template, you determine which portion of the image will be used in the kaleidoscope. The shape of the segment template corresponds to the kaleidoscope shape you've selected.
B. Preview Area
The Preview Area contains a small thumbnail view of the kaleidoscope that is constantly updated as the photo is adjusted in the staging area. The current kaleidoscope shape is listed directly beneath the thumbnail, and below that is the Preview Button. Clicking on the Preview button will generate a full-screen version of the kaleidoscope.
C. Toolbar Area
The buttons in the Toolbar Area are used to perform the following actions:
Open a photo or image
Save the kaleidoscope to a file
Print the kaleidoscope
Choose a different shape for the kaleidoscope
Toggle Pinwheel Mode (controls the "mirroring" that occurs in normal kaleidoscopes)
Flip the image vertically
Flip the image horizontally
Choose a background color for the kaleidoscope